Building tests
When you create a new test on the New test sequence screen, the test is initially empty.
At the top level, a test consists of a number of steps which are executed in sequence. To add a step to a test:
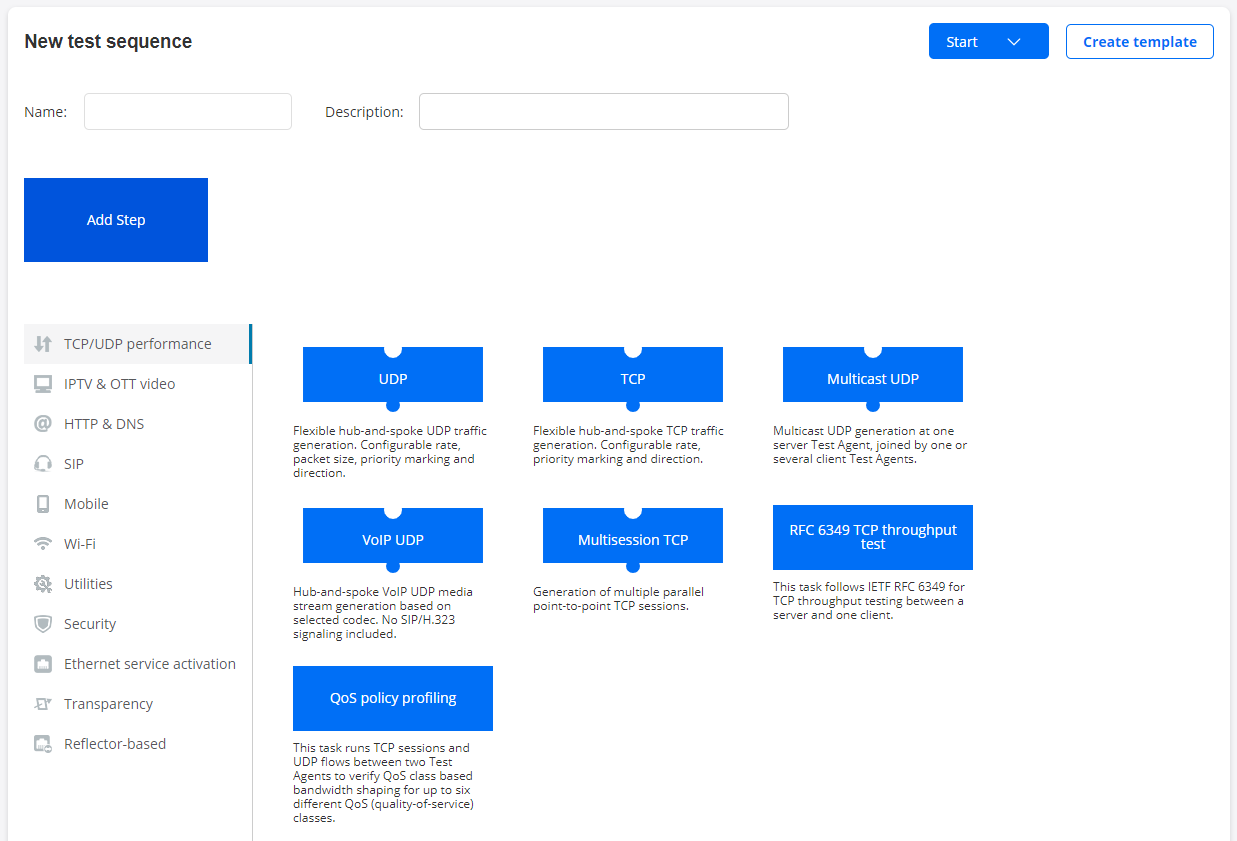
First select a test task category on the left, for example, TCP/UDP performance.
Then click the jigsaw puzzle piece or box representing the desired test task. In the example below, TCP is selected.
Fill in the parameters for the test, as exemplified below. Hover over the “i” symbol for a parameter to view a tooltip explaining it. You can also click the “i” symbol to view a more detailed parameter description in this support documentation (a new copy of it will open on a new tab in your web browser).
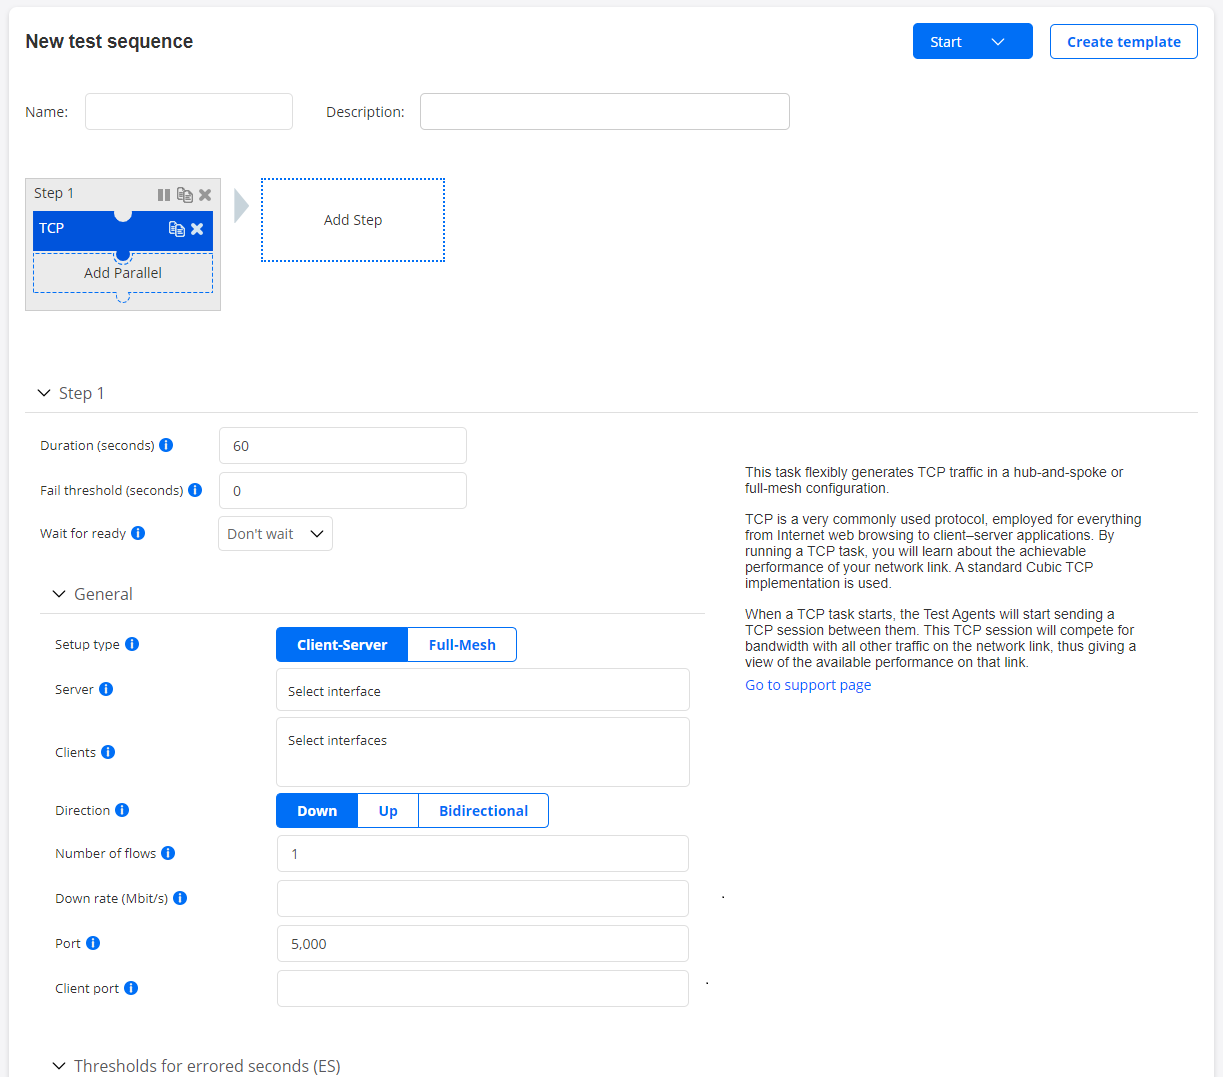
You can apply various filters to the Test Agent interfaces appearing above (in the Server and Clients boxes). Hiding some of these may be useful if you have a large number of Test Agents:
IPv4: Show IPv4 interfaces.
IPv6: Show IPv6 interfaces.
Show offline: Show interfaces of Test Agents that are offline.
Show management: Show management interfaces.
Show external IP: Show external IP addresses of interfaces (configured as described here). They will appear as separate items.
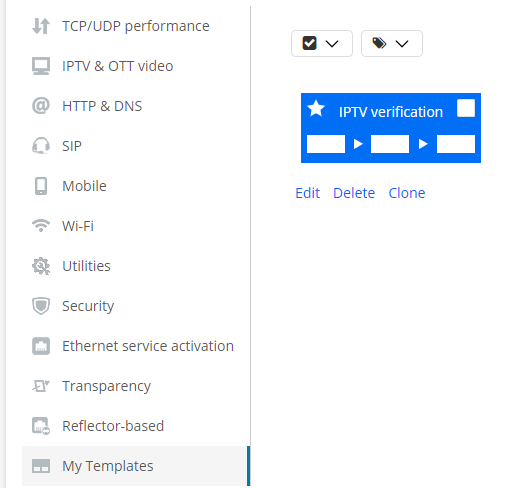
If test templates have been defined, you can build each test step from a template instead. To this end, click the My Templates category on the left, then select the desired template.
Putting test tasks in parallel
A step can contain multiple tasks that are executed in parallel. Note, however, that only a subset of task types can run concurrently with another. Those that can are represented by puzzle pieces on the New test sequence screen; those that cannot are represented by boxes. (There are also certain task types which require exclusive access to the Test Agent, so that no other tests can be assigned to the Test Agent. This is noted for each task type to which the limitation applies.)
To add another task to the step defined:
Click the empty puzzle piece Add Parallel in the currently selected step.
Pick a task in the same way as above. Selectable task types are limited to those allowed in the parallel construct.
The recommended maximum number of parallel tasks in a test step is three.
Putting test steps in sequence
You can also extend the test by adding more steps. Each step will then run to completion before the next step is begun.
To add a step, click the empty box Add Step on the right. Proceed to select a test task as described above. Again, if you like, you can specify multiple tasks to be run in parallel in this step.
In this way you can continue to build your test sequence.
The recommended maximum number of steps in a test is 30.
The maximum number of steps allowed is strongly dependent on the number of parallel tasks in each step and the resource requirements of the task types involved.
Cloning an element in a test sequence
 You can duplicate a task or an entire step in the test sequence by clicking its Clone button.
Cloning a task adds a duplicate of the task (with the same parameter settings) in parallel in the same step.
Cloning a step adds a duplicate of the entire step to the right of the original, again with the same parameter settings for the step and for all tasks contained in it.
Moving a step in a test sequence
 You can move a step one position to the left in the test sequence by clicking its left-arrow button.
 You can move a step one position to the right in the test sequence by clicking its right-arrow button.
Removing an element from a test sequence
 You can remove a task or a step from a test sequence by clicking its Remove button.
Starting a test
When you are done setting up the test, it is ready to be started.
Click the Start button (top right) to start the test.
There are some further options here, accessed by clicking the arrow in the right-hand part of the Start button. Regarding these options, see Options for running tests.
Once the test has been started, it will appear in the Tests view as well as in the overview on the Dashboard.
After a test has been started, it cannot be edited further. To create editable and reusable test templates, use the Create template function. See this page.