Creating templates
The template feature in Routing Active Testing is a very powerful tool for creating complex entities that can be reused as building blocks in tests and monitors. Just like a test, a test template can comprise a multi-step sequence, where several tasks can run concurrently in each step. A monitor template consists of a single step, again optionally with several concurrent tasks.
Moreover, rather than setting fixed values for parameters, you can leave parameters in a template to be defined at runtime. This further adds to the flexibility of templates in that you can reuse them on different occasions without having to edit them.
Creating templates for tests
Start by creating a new test, then click Create template.

The procedure is very similar to building tests, but when setting up individual tasks, a new option Template input is provided for each parameter. This option determines whether the parameter is fixed or variable in the template. The parameters you specify as template inputs are left to be defined at the time of running the test.
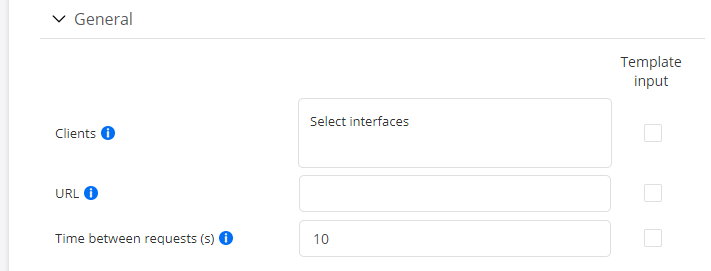
For all parameters that you want to leave to be defined at runtime, select the Template input checkbox.
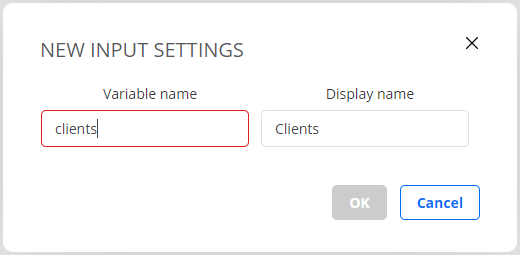
Then, for each of these parameters, select “Create new” in the Input box. You can accept the default Display name for the template input (identical with the parameter name), or you can if you wish name it differently. (The Variable name field is primarily of interest in the context of orchestration: it is the name used to refer to the parameter in orchestration APIs. See the Routing Active Testing orchestration guides for further details.)
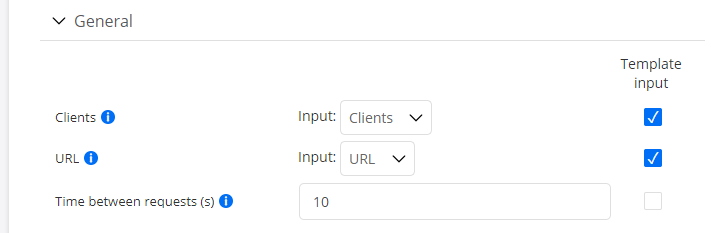
In the screenshot below, Clients and URL are treated as template inputs.
Procedure for building a template
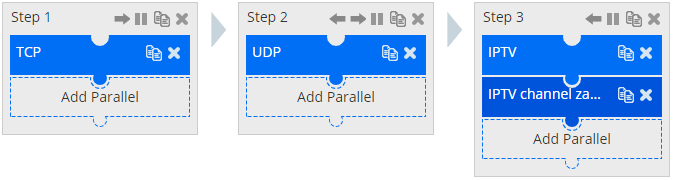
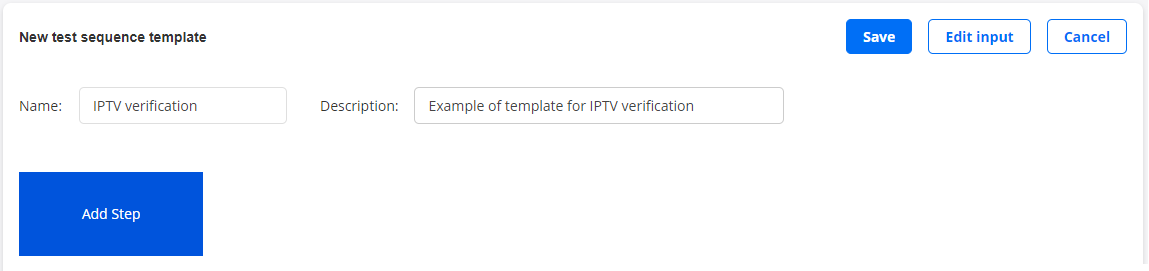
Below we build a simple example of a template, designed to validate a broadband connection for IPTV. The template consists of three steps, as shown in the following screenshot:
Proceed as follows:
Name the template, and optionally enter a description of it:
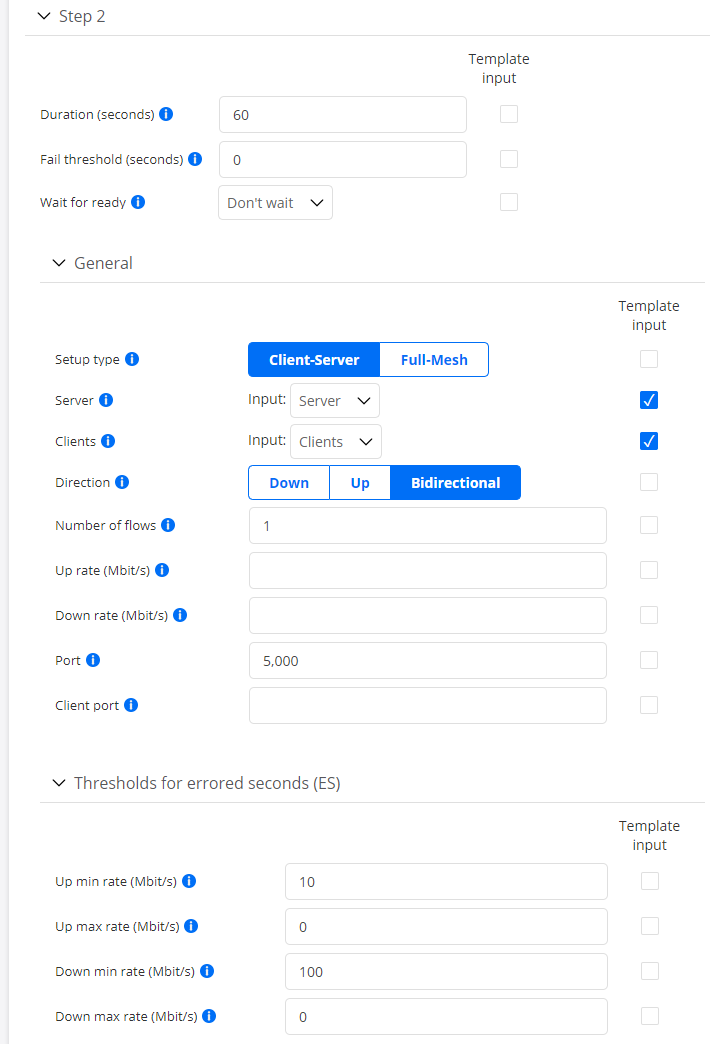
Add a TCP throughput task for testing the throughput, and set the parameters and Template input options according to the screenshot below.
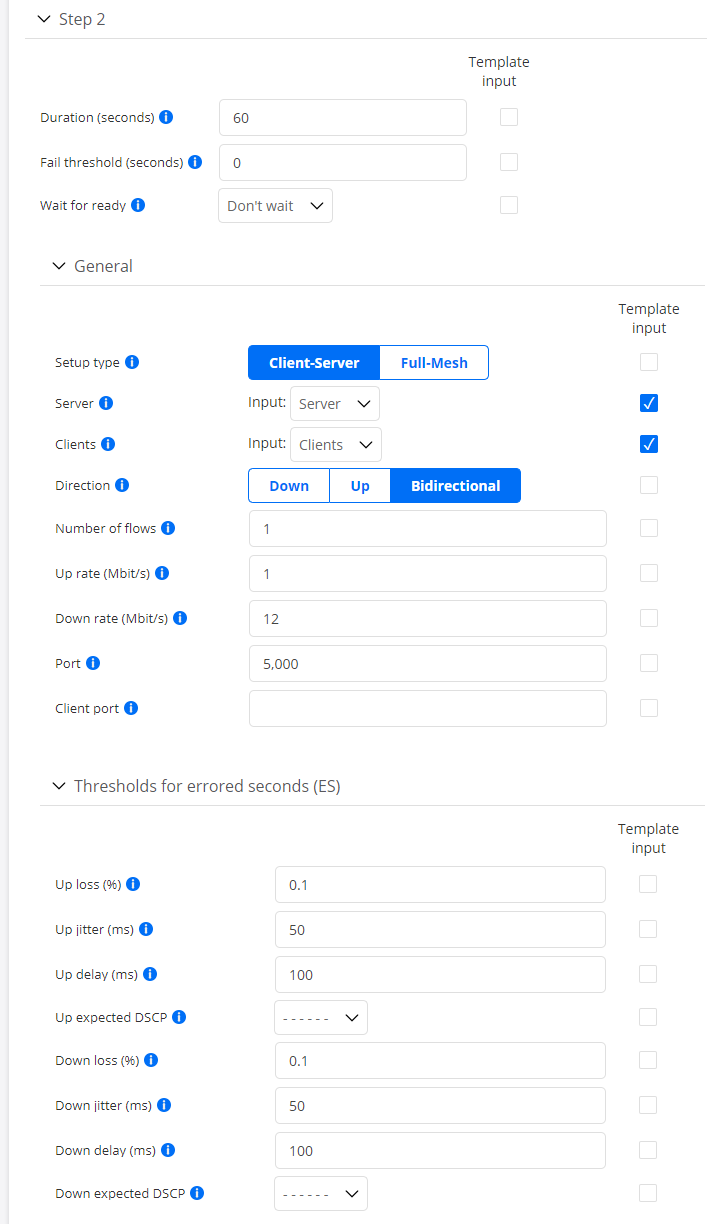
Add a UDP task as a second step in order to as ascertain the jitter and loss characteristics of the connection. Configure the task as shown below.
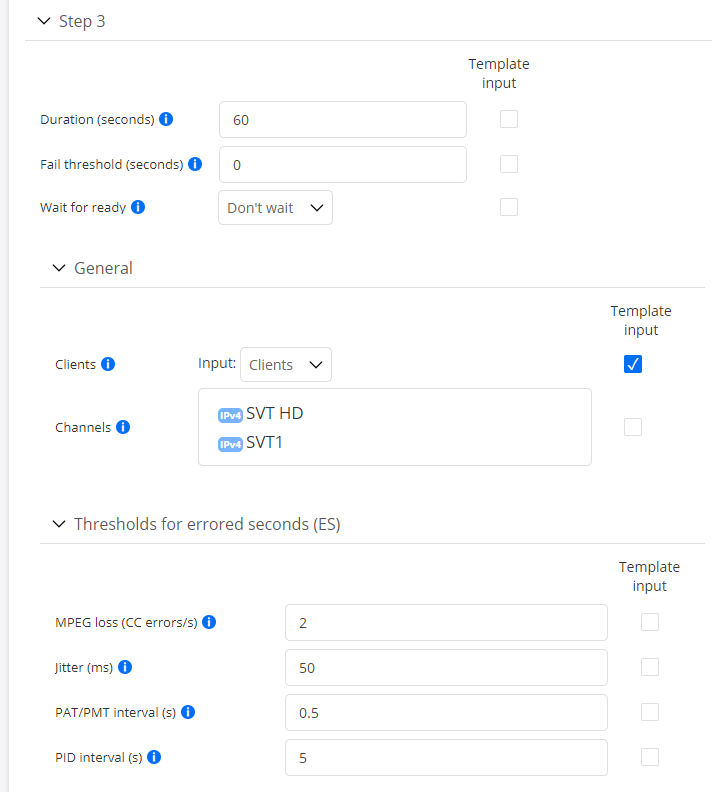
Add a third and final step with an IPTV task and an IPTV channel zapping task in parallel. This step checks the TV characteristics. Configure the step as shown below.
IPTV:
IPTV channel zapping:

Click the Save button at the top. The new template now appears in the My Templates section when you start defining a new test:
Creating templates for monitors
Monitor templates are similar to one step of a test template.
Like test templates, monitor templates offer the Template input option for each parameter, allowing you to postpone the definition of parameters until runtime.
Start by creating a new monitor, then click Create template.
From here onward, follow the procedure for adding a step to a test template, optionally defining several tasks in parallel. See above (and in particular Step 3).
When you are done, click the Save button at the top. The new template now appears in the My Templates section when you start defining a new monitor.
Editing template input
You can modify the properties and handling of template input parameters as follows:
Click the Edit input button at the top of the screen.
A dialog appears listing all parameters marked as template inputs. An example is shown below.
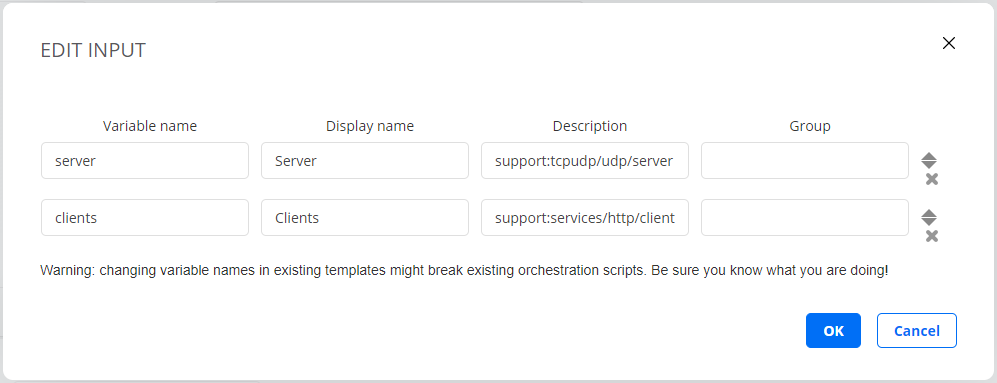
Variable name: Again, this is the name of the parameter used in orchestration. Note: Be careful about changing this; any existing orchestration scripts which use the current name will stop working unless they too are updated.
Display name: Here you can change the parameter name displayed in the Control Center web GUI.
Description: This field by default contains a pointer to the description of the parameter in the present documentation. Clicking the “i” symbol next to the field takes you to that description, and hovering over the “i” shows a short version in a tooltip. If you wish you can replace this with a custom descriptive string. When you create a test based on this template, your custom description will then be shown as a tooltip when you hover over the “i”. Below is an example.

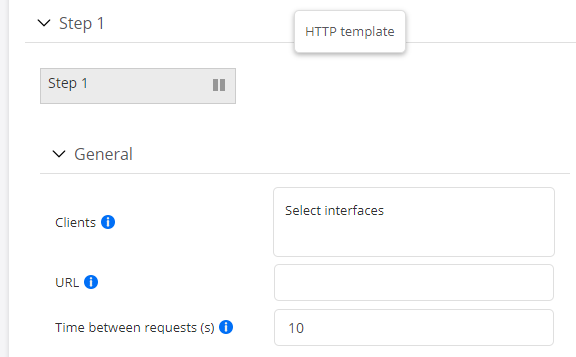
Groups: You can organize all or some of your template inputs into groups of your own design in tests based on this template. These groups will then replace the default ones in the user interface. Enter the same group label for all inputs that you want to keep together in a group. Again, an example will serve to illustrate this.
This setup
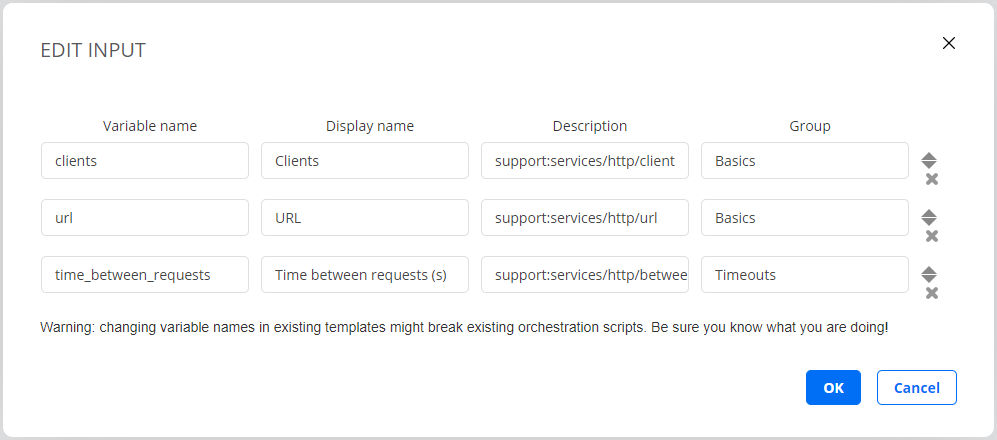
will result in the following user interface for creating a test:
From the Edit input dialog you can also do the following, using the controls on the right:
Click the cross for a template input to remove it from the list of inputs (that is, to hard-code this parameter into the template instead).
Click the up or down arrow for a template input to move it up or down in the list of inputs shown in the user interface.
When you are done editing template inputs, finish by clicking the Save button at the top.
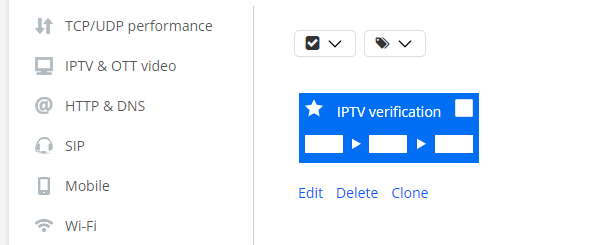
Marking templates as favorites
For both test and monitor templates, you can click a template’s star icon to designate it as a favorite.
That template will then appear under the Favorites menu at the top of the left-side bar with the task categories.

The Favorites menu gives you quicker access to the templates that you use most frequently, especially if a large number of templates have been defined.
Propagating changes in templates to monitors
After you edit and save a monitor template, you need to do the following to apply the changes to any monitor (whether running or stopped) that is based on the template:
Click the monitor of interest in the Monitoring view.
Click the Edit button.
Click the Save button.
This will update the monitor with the modified template.
Note
It is not sufficient to stop and restart the monitor.
(The above procedure is not applicable to tests since you cannot edit tests after creating them.)