Setting up Ping hosts
Ping testing requires at least one Ping host, towards which a Test Agent (acting as initiator) sends test traffic. Ping hosts usually reside in third-party equipment; however, Test Agents also have Ping host functionality and can be added to the Routing Active Testing host inventory in the same way.
Adding Ping hosts is done under Account > Ping. Here you define the hosts that are available in your network and their corresponding host names or IP addresses. These Ping hosts are then used as test points in Ping tests and monitors, as described on the page Ping measurements.
To add a Ping host manually, click the Add button.

This dialog appears:
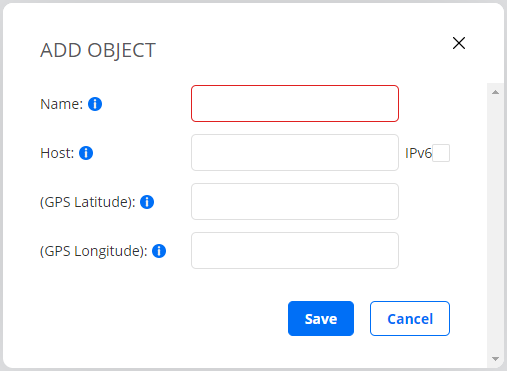
Name: The name of the Ping host.
Host: Host name or IP address of the Ping host.
If you enter an IPv6 address, you also need to select the IPv6 checkbox.GPS Latitude: (Optional) Latitude of Ping host according to WGS 84.
Expressed as a decimal number between –85.06 and +85.06, where a negative number means “south”.GPS Longitude: (Optional) Longitude of Ping host according to WGS 84.
Expressed as a decimal number between –180 and +180, where a negative number means “west”.
The GPS coordinates are handled in the same way as for Test Agents; see this page.
Finish by clicking the Save button.
Tagging hosts
You can apply tags to Ping hosts in order to identify them as having a specific property or belonging to a specific subset.
How to work with tags is covered on this page.
In addition, when importing hosts from a CSV file (see below), you can apply tags to hosts directly in that file, without any user interface actions.
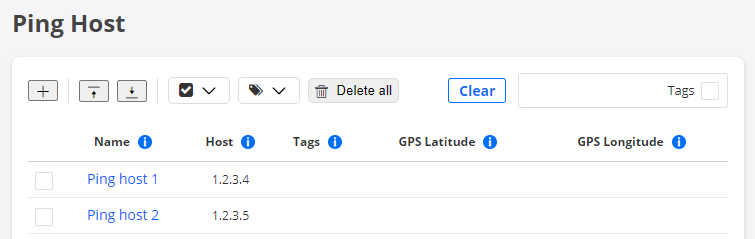
Ping host view
The view shows all Ping hosts known to Routing Active Testing. The information displayed is the same as described above for the “add” dialog, with the addition of this column:
Tags:
Importing a list of Ping hosts from a CSV file
Alternatively, instead of entering Ping hosts manually in the user interface, you can upload a list of Ping hosts as a comma-separated file with extension .csv.
Click the up-arrow button at the top of the view.
In the dialog that opens, select the desired CSV file.
The CSV file must have one Ping host per line, defined according to the following syntax:
name, host, tags, gps_lat, gps_long
The tags field is optional. If several tags are given in the tags string, they must be separated by commas.
Below is an example CSV file where a single Ping host is defined:
"name","host","tags","gps_lat","gps_long"
"Host","192.168.0.1","tag,tag with spaces",65.58,22.15
For full CSV file syntax requirements, see this page.
Please make sure that the file is encoded in UTF-8 format. The encoding can be specified in the text editor settings.
Click the Import button to start the import procedure.
An import dialog appears which also summarizes the requirements on the CSV file syntax.
Either drag and drop your CSV file to the dashed area in the dialog, or click the Browse button to browse the file system for the file.
Under Select file encoding, select the encoding used in the CSV file. The UTF-8 format is recommended for a file that contains international characters.
Then click Import. The Ping Hosts view is now populated with the CSV file content, alongside any Ping hosts previously defined there.
Exporting Ping hosts to a CSV file
You can export the list of defined Ping hosts to a CSV file.
Click the down-arrow button at the top of the view.
In the dialog that opens, click Export.
A CSV file is now exported to the Downloads folder on your machine.
The exported file will adhere to the specifications given on the CSV file syntax page, and it will be encoded in UTF-8.
Editing Ping hosts
You can edit a Ping host by clicking its name in the Ping Hosts view or by clicking its “edit” icon on the far right. The dialog that appears is the same as when adding a Ping host.
Deleting Ping hosts
To delete one or several Ping hosts, do the following:
Select the box on the far left for each host you wish to delete.
Click the trash can button that appears at the top of the view.

Warning
This action permanently removes the selected Ping hosts from your account and cannot be undone. All historical results associated with these hosts are also removed. You will be prompted to confirm that this is your intention.
You can delete all Ping hosts by clicking the Delete all button at the top:

Warning
This action permanently removes all Ping hosts from your account and cannot be undone. All historical results associated with all hosts are also removed. You will be prompted to confirm that this is your intention.