Deploying a virtual Test Agent in VirtualBox
Introduction
This page explains how to start a virtual Test Agent (vTA) from Routing Active Testing in VirtualBox and how to establish contact between the vTA and a Routing Active Testing Control Center residing outside VirtualBox.
Prerequisites
Control Center account
You need an account in a Routing Active Testing Control Center in order to access it: either the one belonging to the Routing Active Testing SaaS solution or one installed on-premise in your organization. If you do not already have a Routing Active Testing account, please contact your Juniper partner or your local Juniper account manager or sales representative.
vTA image
The VNF vTA image is provided either by one of Juniper’s partners or directly by Juniper. If you do not already have the VNF vTA image, you can download it from the Control Center web GUI (whether SaaS or on-premise).
The vTA image is in OVA (OVF/VMDK) format and is packaged using the OVF Tool, which uses a SHA1 checksum. The OVF file specifies version VMX-09, since that is the lowest version which has the requisite functionality. The OVF file also specifies 512 MB RAM and 2 GB block storage for the vTA.
Setting up a virtual Test Agent in VirtualBox
Here is how to load the vTA from the OVA image:
In VirtualBox Manager, select the virtual machine named “vTA”.
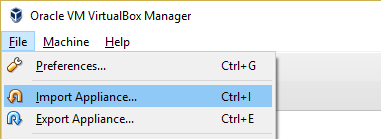
From the File menu, select Import Appliance.
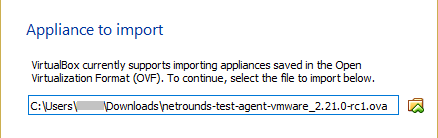
Browse to select the OVA image file (*.ova). Then click Next.
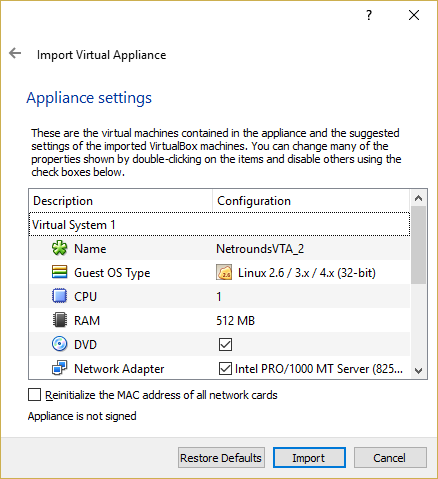
Change the appliance settings if necessary. The default settings are however a good starting point for testing.
Then click Import to go ahead with importing the OVA image.
Now start the virtual machine named “vTA” in VirtualBox Manager. You will be prompted to log in to the virtual machine. Normally the topmost item should be selected in the screenshot that follows:
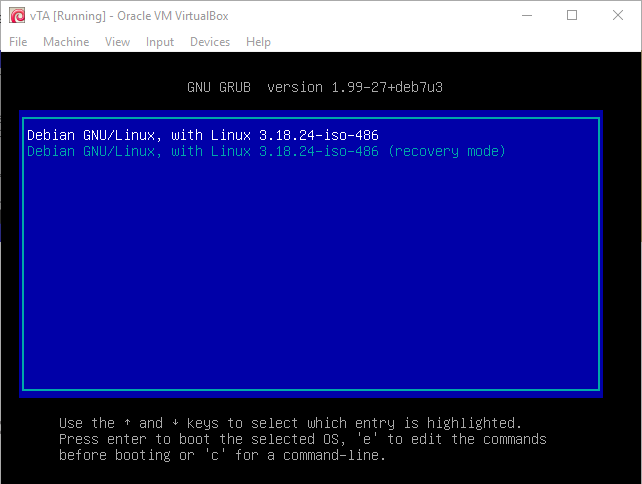
Log in to the Test Agent using the credentials “admin”/”admin” as indicated below.

The Test Agent local console menu now appears. Proceed to register the Test Agent with a Control Center as described here.
How to establish contact with Control Center
This section explains how to establish contact between virtual Test Agents deployed in VirtualBox and a Control Center residing outside VirtualBox.
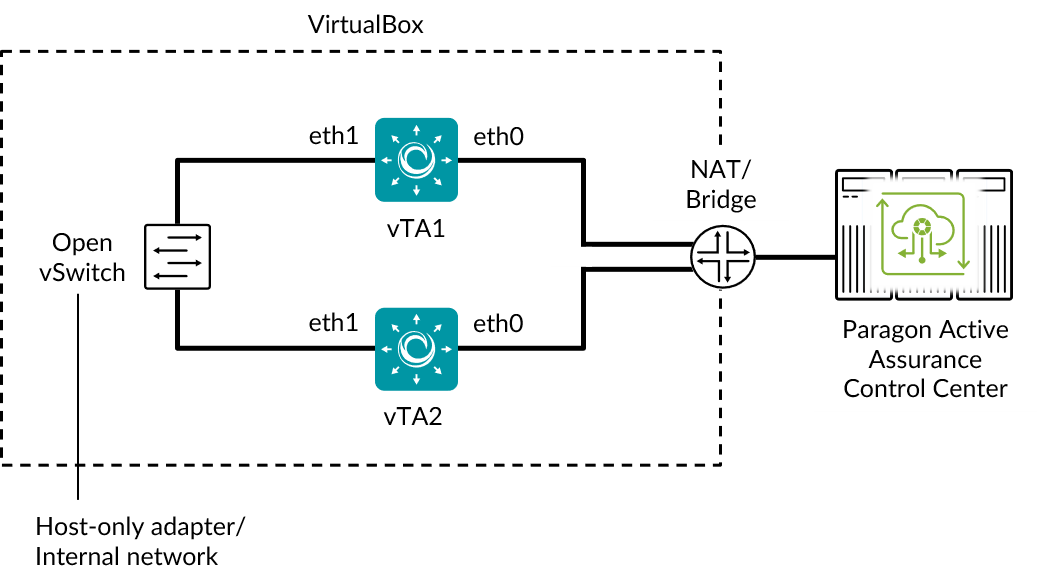
For communication outside VirtualBox, either NAT or a bridge can be used. In the following, the use of NAT is assumed. A bridge may however be preferable if a more transparent setup is needed: for example, to permit communication in both directions between vTAs in VirtualBox and other Test Agents installed elsewhere.
Internally in VirtualBox, the following setup is recommended for each vTA:
The vTA has one network adapter (labeled “eth0” in the diagram below) attached to NAT for communication with Control Center. This is the default setting for the network adapter which is predefined for the vTA.
The vTA has another network adapter (labeled “eth1” in the diagram) attached to a VirtualBox host-only Ethernet adapter. This connection is used for communication between vTAs in the course of testing. How to configure this is covered here and here.
An overview of the setup is given in the diagram below.
A VirtualBox host-only Ethernet adapter allows you to access the vTA virtual machines directly from the host OS, which is convenient especially in a lab environment, where security is not a primary concern. VirtualBox also offers the option Internal Network, which does not permit any direct connection between the virtual machines and the host (but is otherwise similar to Host-only Adapter). You may wish to use the Internal Network option if you want an entirely closed network inside VirtualBox, not accessible from external hosts. See this section for instructions on how to connect the vTA to an Internal Network adapter.
Setting up a VirtualBox host-only Ethernet adapter
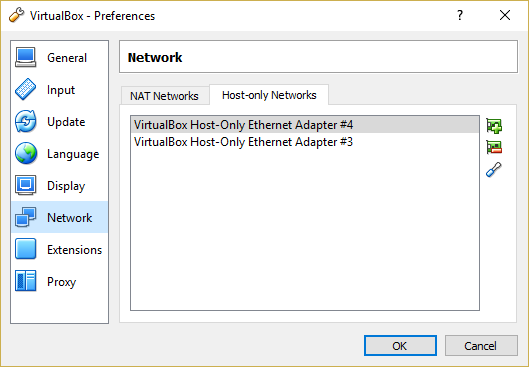
From the File menu, select Preferences.
Select Network, and click the Host-only Networks tab.
Click the
 (“New”) button.
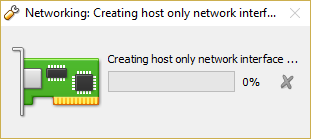
Wait for this procedure to finish:
A new VirtualBox host-only Ethernet adapter will now appear in the listing:

Double-click the new Ethernet adapter.
In the dialog that appears, select the DHCP Server tab.
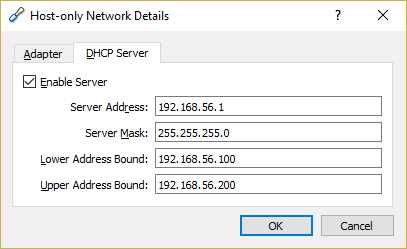
Check the Enable Server box.
Enter Server Address and Server Mask, and set lower and upper address bounds. An example is shown in the screenshot below.
Connecting vTAs to a host-only Ethernet adapter
For each vTA in a subset that should be able to communicate with each other, do the following:
Power off the vTA if it is currently running.
With the vTA selected in the main window, click Settings.
In the left-hand pane, select Network.
The Adapter 1 tab defines the default network adapter which is attached to NAT. This network adapter can be left as-is.
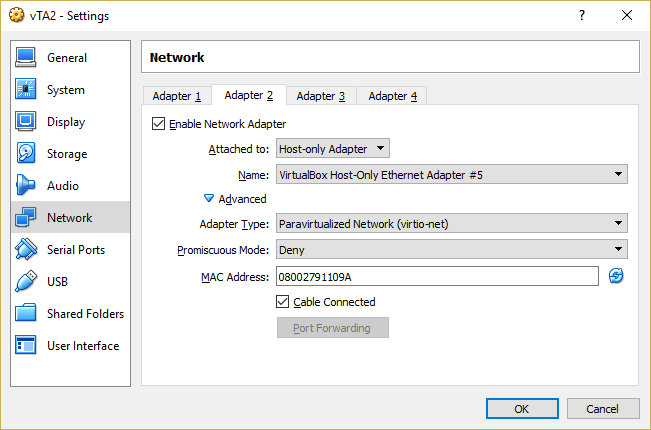
Click the Adapter 2 tab. Here we will define a second network adapter for the vTA and attach it to the host-only adapter created in this section.
Check the Enable Network Adapter box.
Under Attached to, select Host-only Adapter.
Under Name, select the adapter that you created in this section.
Expand the Advanced section.
Under Adapter Type, select “Paravirtualized Network (virtio-net)”.
Make sure that Cable Connected is checked.
Finish by clicking OK.
Refer to the screenshot below.
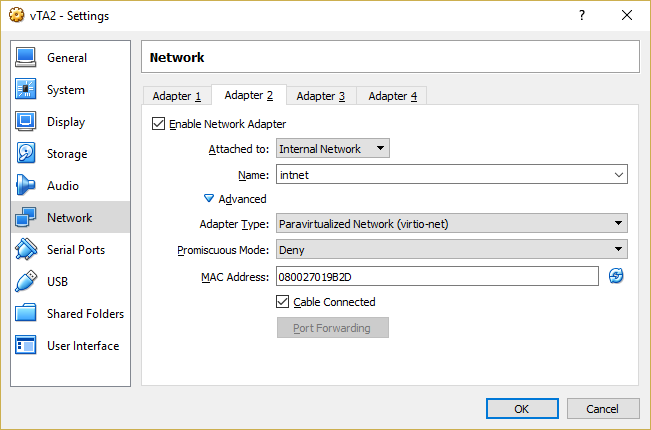
Connecting vTAs to an Internal Network Ethernet adapter
If you are using an Internal Network adapter, here is how to set up the vTAs:
Navigate to the vTA network adapters as described here.
Check the Enable Network Adapter box.
Under Attached to, select Internal Network.
Expand the Advanced section.
Under Adapter Type, select “Paravirtualized Network (virtio-net)”.
Make sure that Cable Connected is checked.
Finish by clicking OK.
Refer to the screenshot below.